Cold frame and Reflector Project
This project was the biggest project we have done so far, and because it had several mini projects in it, we toke a couple months to complete it. Roughly 42 hours in class working on this project. Throughout this journey we picked up lots of knowledge. Including what atoms are and how they work, how to insulate heat from the sun, the angles of the sun at different times of the year, and how to reflect light in different ways. We started with building a solar water heater, where we learned about radiation, convection, and conduction. We did a daylighting design activity where we made cardboard models of a house, and placed windows in the best places to get the most light in the house. Then we did a sight selection where we looked around San Marin's campus to find the best place where a house could be put. Also we conducted a materials testing lab where tested a number of materials to find which ones were the best at retaining and keeping in heat. We learned about wind turbines and how they work. For the finale we designed models for a cold frame to put in our San Marin garden, and a reflector to be placed out by the solar house to reflect light into the north window that wasn't getting any light in it to begin with.
Solar Water Heater
|
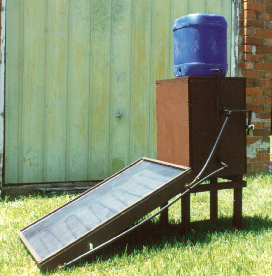
Our task for this project was: Under the constraints of the materials list below, design a device that uses solar energy to heat water. Our materials were: Plastic tubing (2ft), soft coper tubing (3ft), water container, insulation, aluminum foil, cardboard, plastic sheet.
|
|
|
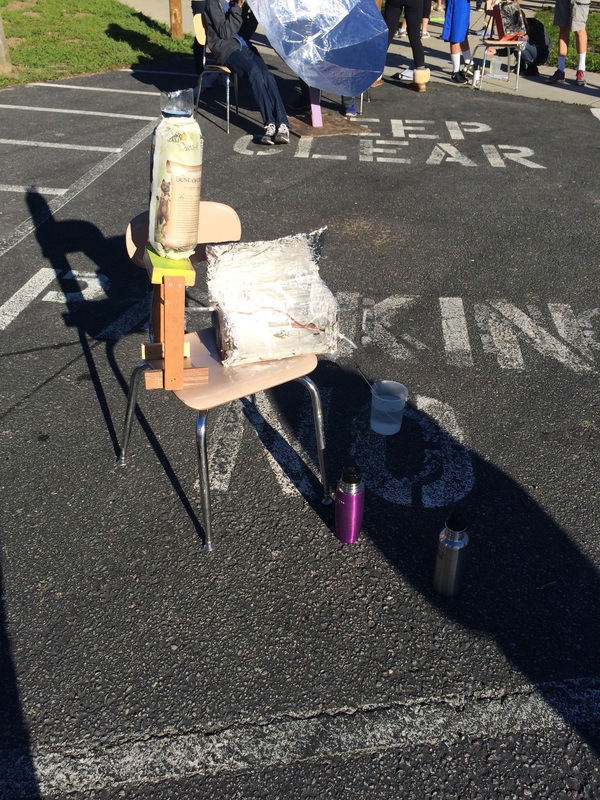
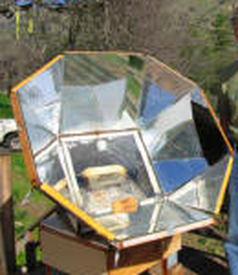
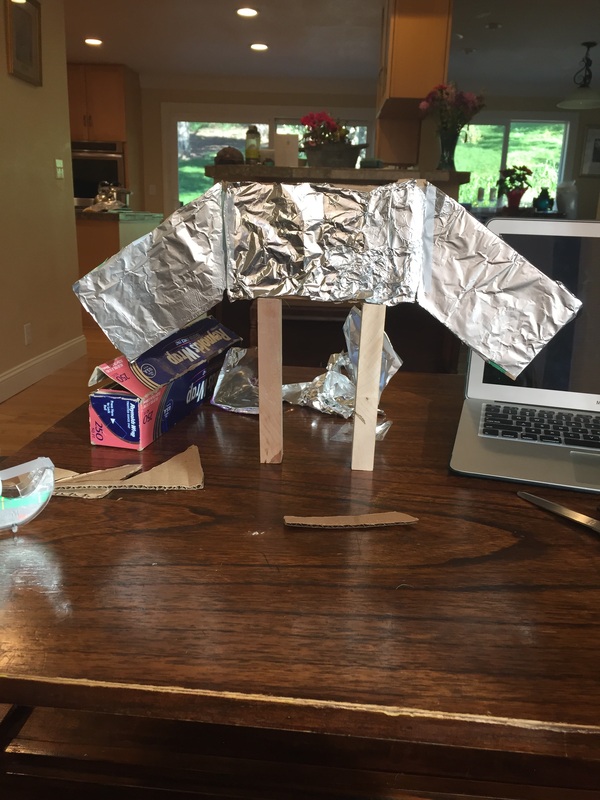
We started the project with a few lessons on thermodynamics, atoms, and how light reflects to begin this project. Then we made some blueprints for our solar water heater. We decided on a simple idea of running water through the coper tubing that was in an insulated shoebox. We figured if we put aluminum foil on our shoebox flaps the sunlight would reflect off of it and onto our coper tubing heating it up. Then when we ran the water through it the water would heat up also. Unfortunately our seemingly flawless idea was foiled, we had a leak where the plastic tubing was connected to the water bottle that held our 800ml of water we needed. So every time we tried running the water through we were slowly loosing more and more. We started at 800ml and at the very end of the 20 min testing period we ended up with a significantly smaller 300ml. So in total we ended up loosing 500ml of water. For this project I wish our group had thought more out of the box because other groups with more creative ideas had a lot more success. For example, instead of constantly running the water through the heater, some groups left their water in the coper tubing just letting it heat up being much more beneficial. One group even had a black box with their water in it surrounded by a giant satellite looking structure covered in aluminum that toke all the light and heat in the circumference of the circle and concentrated it all on the black box, which was brilliant. Unfortunately our group had to sit their watching their water temperature rocket while we were trying to clean up our spilling water. Now I know that when it comes to these kinds of projects I need to think more outside the box.
Daylighting and Design Activity
In this project we had to build a cardboard model of a house using different types of techniques to get sunlight into the house. First we were given 1000 square feet and we had to draw a house in those dimensions without any windows, then we found out how many lightbulbs would be put in each room and about how many hours a day they were on. Then we put in different daylighting techniques like windows, clerestory windows, skylights, and solar tubes and calculated the new number of how many hours each bulb was being used. Considering our last project wasn't creative enough we decided to put a little twist on this one, we made a circle house. With the middle being raised up into a smaller circular second story. Our house was spectacular.
After calculating how many hours each light bulb would use in the house without windows we found that the average time the bulbs were on was 5.5 hours. Which then transferred to 10.323 kilowatts of usage. After making the windows and other various types of daylighting we found the average hours of the bulbs usage per day went down to 2.8 hours. Which then translated to 3.39 kilowatts. In total we had 6.933 kilowatts of energy saved. Thats a huge difference on your electrical bill. After doing the calculations we then built our house out of cardboard and actually tested it. We used a lightbulb to emulate the sun and held it by our house the way the sun would shine on it. We rotated the bulb over the house in the way the sun would during summer time to see how much light our house got. Then we rotated the bulb over the house the way the sun would in winter, again getting to see how efficient our house was.
After calculating how many hours each light bulb would use in the house without windows we found that the average time the bulbs were on was 5.5 hours. Which then transferred to 10.323 kilowatts of usage. After making the windows and other various types of daylighting we found the average hours of the bulbs usage per day went down to 2.8 hours. Which then translated to 3.39 kilowatts. In total we had 6.933 kilowatts of energy saved. Thats a huge difference on your electrical bill. After doing the calculations we then built our house out of cardboard and actually tested it. We used a lightbulb to emulate the sun and held it by our house the way the sun would shine on it. We rotated the bulb over the house in the way the sun would during summer time to see how much light our house got. Then we rotated the bulb over the house the way the sun would in winter, again getting to see how efficient our house was.
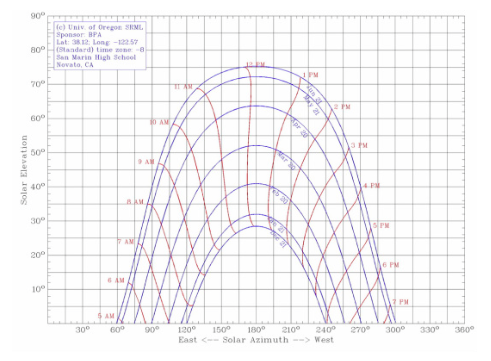
Sun Angles
Below is a chart that we used frequently throughout this processes to see how the sun angles came in on San Marin during the course of the year. This helped us greatly on what angle we needed use for our solar water heaters, our cold frames, our daylighting and design technique houses, and our reflectors.
Site Selection
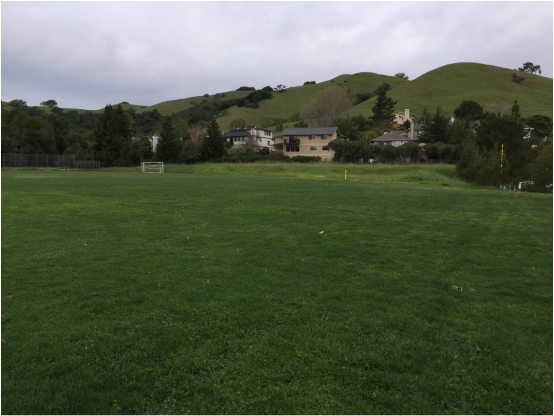
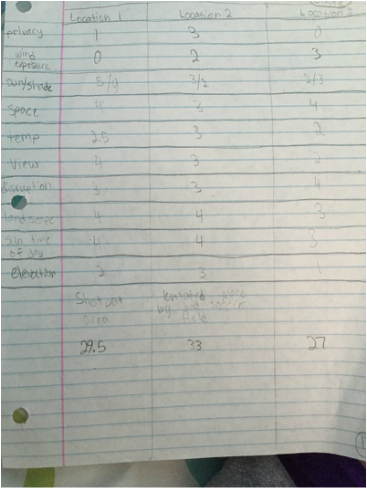
In order to build a house we would need to find a great location for it. Since a house was already built last year, we don't get the chance to build one. So our house is theoretical. During our selection, we had to keep in mind the many factors people would want for their house. These factors include temperature, sun angles, season variation, sun percentage, shade percentage, time of day variation, use of the structure and where it makes sense to place it, privacy, wind exposure, view, landscape, and elevation. After walking around the school for a bit, we decided on three locations. While we were looking at the locations we were rating on a scale of 1-5 all the key components we thought were the most needed for the house. After getting back to class we toke the average of all our locations to find the best one. Our best location which can be seen below is on an uplifted piece of land by the old soccer field. We saw that it didn't have to much sun or to much shade, the view was pretty nice, it had good space, and there was minimal disruption. We then concluded this would be a perfect place to put our theoretical house.
|
|
Materials Testing Lab
Before we started building our cold frames we needed to know how things got insulated and what insulation was. So we made a giant list of items that we though would be good insulators, or in other words which materials had the highest specific heat capacity. Our list included absorbing materials such as colored paints, rubber, tar paper, and brick. We designed the experiment so each group had 3-4 items that they would be testing the temperature of every five minutes for 20 minutes. we used a lightbulb as our heat source and it was hanging over all our items. My group got tar paper, tire, and terra cotta. Since we only had a terra cotta pot we had had to smash it to pieces to be able to take an accurate temperature. Our group accidentally messed up our experiment, we forgot to put cardboard under our materials so during the experiment the cold back table underneath was constantly pulling heat from all of our items, making our results very inaccurate. On top of that we also had the light bulb too far away from our items so they weren't getting the same amount of heat as all the other groups items. Even though there was much experimental error we could still get a better idea of what items were better insulators.
Wind Turbine Activity
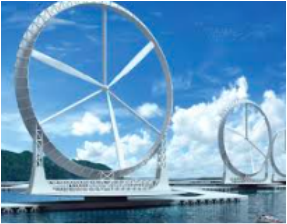
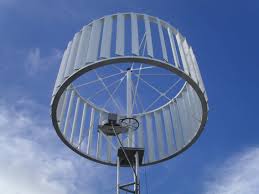
The problem for this lab was: What is the problem that you are trying to solve with the design of a wind turbine for a house? First we needed a little background knowledge on what a wind turbine even was, so we learned a little about VAWTs and HAWTS. A VAWT is a vertical axis wind turbine and they are the less common wind turbines you would see around. The other ones are HAWTs which are horizontal axis wind turbine. The HAWTs are generally a lot more effective than VAWTS, and you are more likely to see them around where you live. Also we learned about how and where people out the wind turbines, such as you want them higher up so trees or other physical features don't block the wind coming in. But you don't want them up to high or else when they malfunction it will be a costly labor intensive fix. Once we had some background knowledge on the wind turbines we had to design some of our own. We had to keep in mind in our design that we wanted to produce the least amount of drag. Blade drag is when the blade isn't sufficient enough to produce a good amount of energy making the wind turbine almost useless. Unfortunately when we tested our VAWT it didn't work, we hadn't though our idea all the way through and the wind form the fan was pushing from both sides of our turbine canceling each other out. Luckily by time it came to build our HAWT we had a figured out a strategy, that we wanted it to be as small as possible. So we made our HAWT a small circle with cuts along the edges then folded slightly in to give the wind something to push on. Finally it started spinning, we had successfully created a working horizontal wind turbine.
HAWTS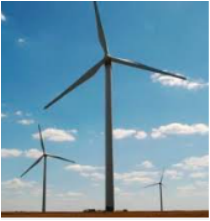
|
VAWTS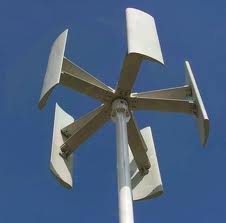
|
The Coldframe and the Reflector
To conclude all of our labs and activities we created a coldframe for San Marin's garden so the plants wouldn't die in the winter, and a reflector for the north window on the solar studios.
Our group started working with the coldframe first, and it started out really well. We had lots of ideas flowing and already had many ideas of what design we wanted to do. We then went back to what our need was, to keep the plants in the garden from dying in the winter. So in our cold frame design we had a window almost perpendicular to the ground with a big triangular back. We used this design because it would let in the most sunlight right before dark allowing the coldframe to retain the most heat before it got really cold at night, therefore the plants would survive. After finding our design we had to make our plan more realistic, we went shopping online to find the best prices for the materials we would need. We made some blueprints, and finally we made a scale model out of cardboard to give the judges a visual of what we were trying to show them. Our roof was openable and could open all the way up or partial way. Our window side was facing the west so our cold frame could get in as much sunlight as we could to make sure the plants were warm enough so that they wouldn't die from being to cold in the night.
Our group started working with the coldframe first, and it started out really well. We had lots of ideas flowing and already had many ideas of what design we wanted to do. We then went back to what our need was, to keep the plants in the garden from dying in the winter. So in our cold frame design we had a window almost perpendicular to the ground with a big triangular back. We used this design because it would let in the most sunlight right before dark allowing the coldframe to retain the most heat before it got really cold at night, therefore the plants would survive. After finding our design we had to make our plan more realistic, we went shopping online to find the best prices for the materials we would need. We made some blueprints, and finally we made a scale model out of cardboard to give the judges a visual of what we were trying to show them. Our roof was openable and could open all the way up or partial way. Our window side was facing the west so our cold frame could get in as much sunlight as we could to make sure the plants were warm enough so that they wouldn't die from being to cold in the night.
The goal of our reflector seemed simple, get sunlight into the north window of the solar studio, soon after we started thinking of ideas the reflector project soon became hard. We had to know what the angles of the sun during the different times of year to make sure our reflector was placed just right to get the maximum amount of light in the window during the winter. We ended up having a design that had three panels all right next to each other to capture a bigger range of light. We made sure that the flaps were at a 140 degree angle to catch the suns angle of about 22 degrees. The middle panel is 8 feet by by three feet with the bottom being 6 feet. The two panels on the sides were 4.5 feet by 3 feet. Unfortunately since we didn't spend much time on this project we forgot some very silly things to consider. Such as we forgot to calculate how far away we wanted our reflector to be away from our house. Also how much the wind would catch on the panels and knock the whole thing over which would turn out disastrously. Also since the two panels were aiming the light to the middle and three times the amount of light would be hitting the window it could catch fire, also a calamity. We defiantly learned a valuable lesson on time management with this project.
Justification
As a class we all looked up different ways to get power or energy and compared them. We did this to what our whole project was about. That the world is loosing it's resources that we use everyday for power and that one day it's going to run out. This project has helped us broaden our horizons on many different ways to get heat and energy without using our earth's precious resources.
Key Concepts
Nucleus~center of an atom
Molecule~multiple atoms bonded together (example:H2O, CO2, C6H12O6, O2)
Compound~type of molecule with different types of elements bonded together
Isotope~an atom with an unusual number of neutrons
Ion~an atom with an unusual number of electrons
Conduction~transfer of heat through a solid
Convection~transfer of heat through fluid (liquid/gas)
Heat~a form of thermal energy (unit: J)
Thermal Conductivity~the rate at which material transfers heat
Thermal Resistance~ the ability of material to resist transferring heat
Archimede's principle~ an immersed object is buoyed up by a force equal to the weight it displaces
Content~pressure of a gas is inverse to volume and directly proportional to temperature
Boyle's Law~P1V1=P2V2 (starting conditions=end conditions)
Bernoulli's Principle~at speed of a fluid increases the pressure decreases
Specific Heat Capacity~constant for a substance that measures how slowly it heats up
High Specific Heat~warms up slowly, holds lots of heat well
Water~has a high specific heat capacity of 1cal/GdegreesC or 4.184J/GdegreesC
1st Law of Conservation of Energy~ energy is neither created nor destroyed, heat is a form of energy
2nd Law of Conservation of Energy~entropy increases, disorder increases, overtime everything becomes the same temperature
3rd Law of Conservation of Energy~temperature can never get to absolute 0, heat always exists
Reflection
This was the never ending project, when we heard we would be spending about 2 whole months on it, that seemed like it would be forever. In the end I realized that I wish I had more time, to perfect our projects and to learn more about these really interesting topics. Overall our group and projects went pretty well, even though some of our projects epically failed. Some of my group working skills were pushed to the limits, which I feel like was a peak. I think I grew as a person because I learned that I needed to take a good look at the people I was working with and adjust how I did things thing to make sure it worked well with the rest of my group. I got better at finding tasks that needed to be done and assigning them to the other people in my group that didn't have anything to do at the time. I feel like another peak was that we didn't have any lack of creative ideas, they always kept coming. Especially in our model houses we had to make for the daylighting design technique, we were the only group to make a circle house. I also really liked that our ideas weren't to outside the box, they stayed reasonable. Some pits were I don't think our group was very good with distributing the work, we got distracted easily. Some people would continue to stay on task, but I think overall we should have tried to even out the work more so it doesn't just put stress on only a few people in the group. Another pit obviously, was some of our projects not working as well as we would have liked them to. Such as our solar water heater, since we didn't get to test it out as much as we would have liked to we didn't get to catch the leak until it was to late, throwing off all our numbers. Also in the wind turbine lab our HAWT didn't work at all when we went up to test it, which was quite humiliating. I feel like I need to improve on making the group more enjoyable so all the people in the group want to do their best and try their hardest and contribute all their ides. It would just make the group dynamics so much better and everyone would be on task and working. Also our projects would turn out better which would be a huge plus. I also need to improve on time management a lot more. At the end of every project I have said that I need to improve on time management, and then in the next project reflection I just say the same thing. I really need to buckle down and make sure that I stay on schedule and make sure no one in my group is behind either. It just helps relieve so much stress and your group has a lot more time to catch silly little mistakes like not knowing your reflector could set the solar studio on fire.
